
} void loop() { for(pos=0;pos<=180;pos++) { myservo.write(pos);. //create a servo object int pos = 0;. While dc servo motor performance is dependent only on voltage, ac servo motors are dependent on both frequency and voltage. Two of these wires are to provide ground and positive supply to the servo dc motor. Connecting the motor to raspberry pi through wires take note that the motor has a set of 3 wires, red, brown, and. It's pretty cheap and super easy.supplies for this video:radio controller and receive. The third wire is for the control signal. Servo motor with arduino uno. Rotary encoders can be used to control different types of motors. //pin of the second button #include <<strong>servo</strong>.h> //include the servo library servo servo;
Here are the lists of the tools which is necessary to build the control the system of servo. Setting up raspberry pi to control the servo motor step 1: Before you get control of a servo motor, you will need some tools to do the tricks. Two of these wires are to provide ground and positive supply to the servo dc motor. //pin of the first button int button1 = 3; Here's how to control servos and other things with a radio controller. Answer to control the speed of servo motor without blocking other code, we can use millis () instead of delay () wiring diagram image is developed using fritzing. How fast can a servo motor move? It's pretty cheap and super easy.supplies for this video:radio controller and receive. Servo motor with arduino uno.
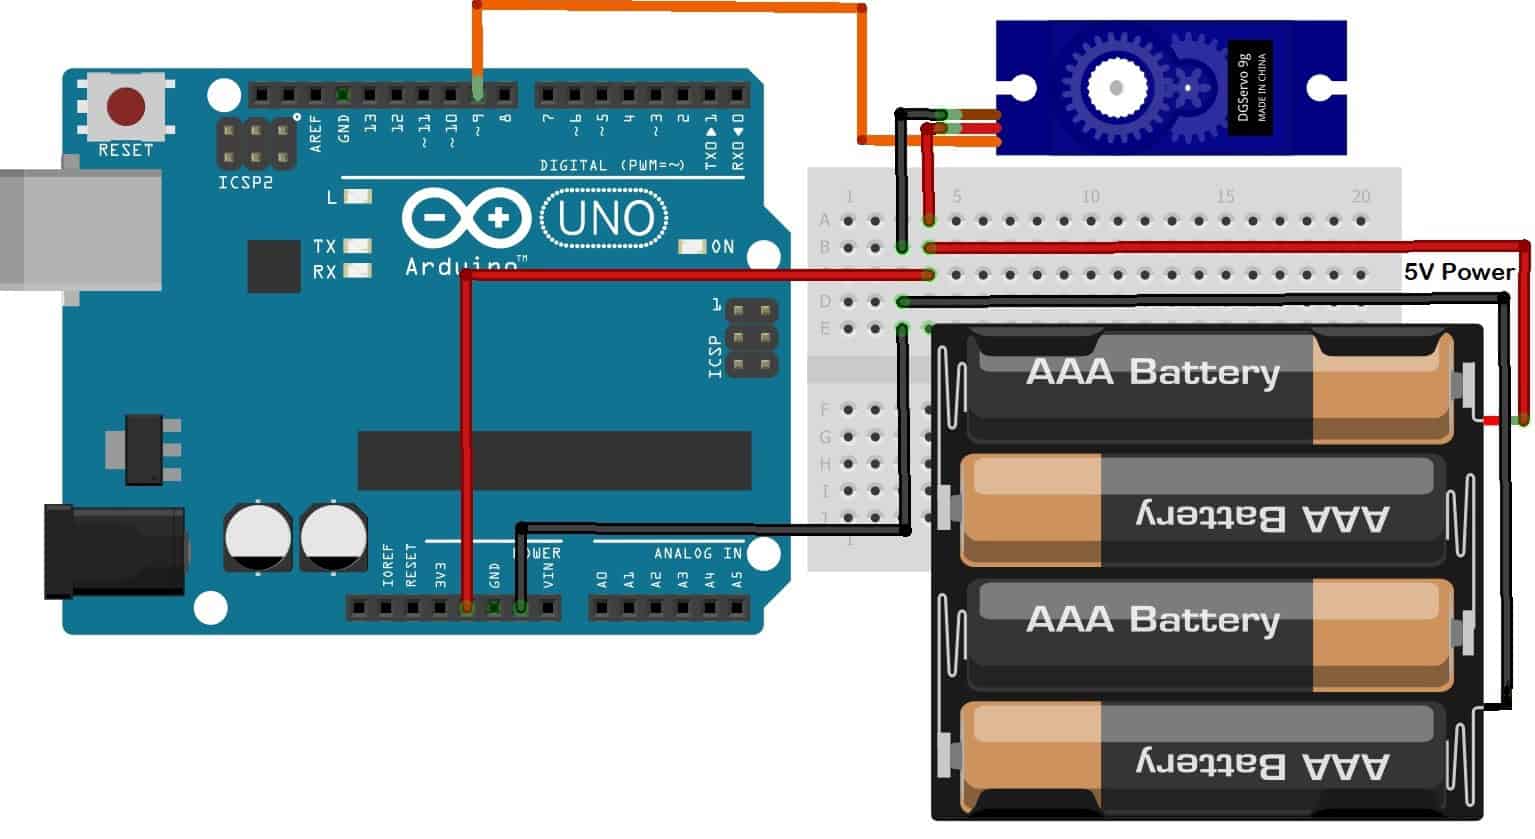
Servo is a motor that can. Before you get control of a servo motor, you will need some tools to do the tricks. The servo motors come with three wires or leads. Using arduino we can easily do this. Connecting servo motor with arduino is very easy just connect the power wires red and brown of servo motor with 5v and gnd pins of arduino respectively. The third wire is for the control signal. Servo motor with arduino uno. Rotary encoders can be used to control different types of motors. //pin of the second button #include <<strong>servo</strong>.h> //include the servo library servo servo; } void loop() { for(pos=0;pos<=180;pos++) { myservo.write(pos);.
Servo motor with arduino uno. Connecting servo motor with arduino is very easy just connect the power wires red and brown of servo motor with 5v and gnd pins of arduino respectively. } void loop() { for(pos=0;pos<=180;pos++) { myservo.write(pos);. How fast can a servo motor move? Two of these wires are to provide ground and positive supply to the servo dc motor. //pin of the second button #include <<strong>servo</strong>.h> //include the servo library servo servo; I’ll show you how to read the position from a potentiometer and control the speed of the 360 degree servo using arduino in the following steps: While dc servo motor performance is dependent only on voltage, ac servo motors are dependent on both frequency and voltage. Here's how to control servos and other things with a radio controller. It's pretty cheap and super easy.supplies for this video:radio controller and receive.
While dc servo motor performance is dependent only on voltage, ac servo motors are dependent on both frequency and voltage. How fast can a servo motor move? Setting up raspberry pi to control the servo motor step 1: Two of these wires are to provide ground and positive supply to the servo dc motor. Using arduino we can easily do this. It's pretty cheap and super easy.supplies for this video:radio controller and receive. Here are the lists of the tools which is necessary to build the control the system of servo. I’ll show you how to read the position from a potentiometer and control the speed of the 360 degree servo using arduino in the following steps: Connecting the motor to raspberry pi through wires take note that the motor has a set of 3 wires, red, brown, and. Rotary encoders can be used to control different types of motors.